Not sure which materials will actually make your first DIY project feel doable instead of overwhelming?
Practical DIY and handmade project ideas
Opening
In this article, you’ll learn how to choose craft materials that reduce friction, save time, and make small projects feel satisfying. You’ll come away with clear decision rules, a realistic example you can copy, and practical fixes for common beginner mistakes.
Choosing The Right Craft Materials For Beginner-Friendly DIY
Core explanation and one realistic example
The central idea is simple: match the material’s personality to what you want the finished piece to do and how you like to work. Materials have strengths and quirks — some forgive mistakes, some need precise tools, and some let you get visible results fast. If you pick a material that fits your time, space, tools, and the look you want, the project becomes an enjoyable process instead of a series of frustrations.
Think of this as a three-step decision rule you can apply every time:
- Define the project’s purpose and constraints. Will the item be handled daily? Is it for display only? Do you have a few hours or several weekends?
- Match material properties to those constraints. Look for forgiving textures, wide tolerances, and low-tool needs when you’re learning.
- Test at small scale before committing. A tiny sample or mockup answers more questions than guessing.
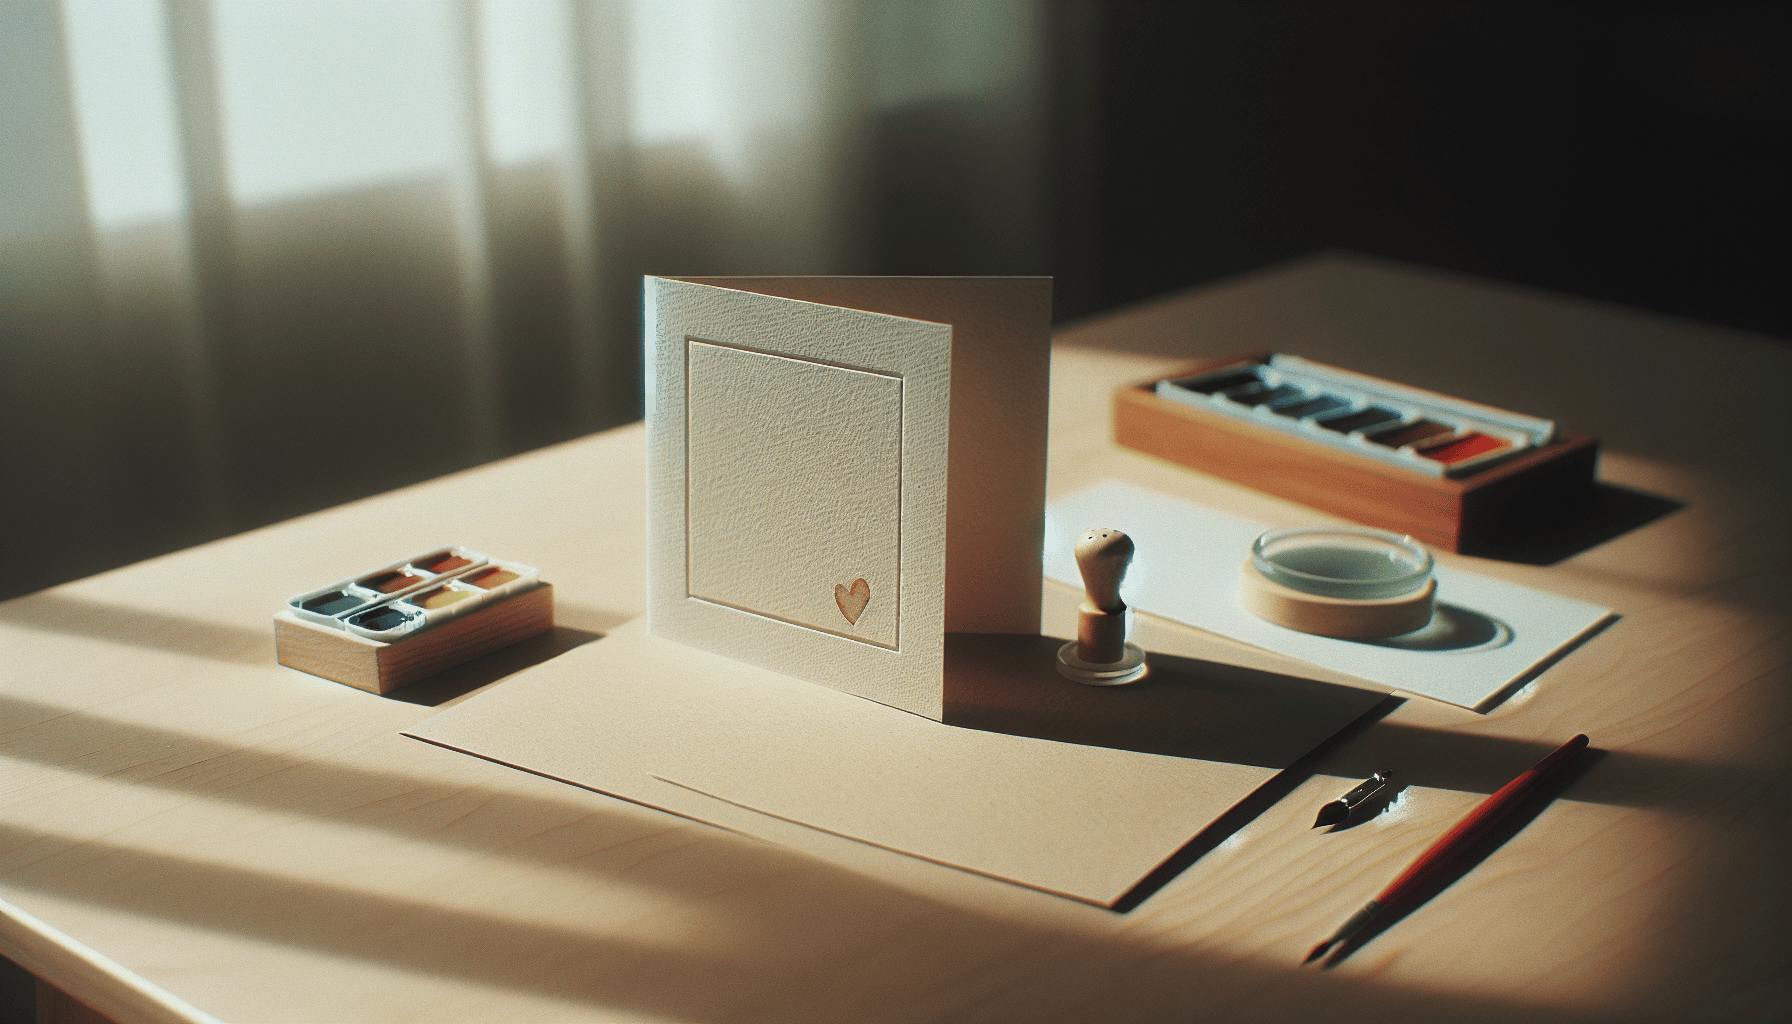
Realistic usage example — weekend handmade cards in a small space Imagine you want a calm, two-evening project: a set of four greeting cards using simple textures and subtle color. You live in a small apartment with limited storage and one multipurpose work surface.
How the rules apply:
- Define purpose and constraints: small scale, low cost, minimal storage, and an evening-or-two time budget.
- Match materials: heavyweight cardstock (for a professional feel that’s easy to fold), acrylic ink or a set of watercolor half pans (small, affordable), a basic adhesive tape runner (clean and quick), and a few rubber stamps or a simple stencil (repeatable, forgiving).
- Test small: make one card as a prototype — fold, stamp, stick, and paint a tiny accent. If adhesives wrinkle the paper or paint feathers, try a different combo before making the rest.
Why this works for beginners
- Cardstock forgives slight miscuts and hides modest adhesive mistakes.
- Watercolor half pans require little setup and allow you to practice mark-making without a permanent commitment.
- Stamps and stencils let you create consistent, attractive outcomes even if your freehand skills are still developing.
- Everything stores flat or in a small box.
This same thinking — define, match, test — scales to other kinds of projects (a sewn pillow, a painted shelf, or a recycled planter), but the principle stays the same: choose materials that reduce the decision load and reward small wins.
Key materials for beginner-friendly DIY
Below you’ll find material families that suit beginner-friendly projects, plus why each is a good starting point, typical tools you’ll need, and quick decision rules for choosing among options.
Paper and adhesives Paper is friendly because it’s low-cost, low-mess, and easy to cut or glue. Choose these starter items:
- Cardstock (80–110 lb / 200–300 gsm): sturdy, folds cleanly, accepts inks and paint well.
- Mixed-media paper (140 lb / 300 gsm): if you plan to use wet media regularly.
- Glue stick or adhesive tape runner: tidy and forgiving for paper projects.
- White PVA craft glue (multipurpose, dries clear): better for heavier embellishments and bonding different materials.
Decision rules:
- If you want crisp folds and minimal buckling, pick heavier cardstock.
- If you’ll use washes or layered paint, choose mixed-media or watercolor paper.
- Use tape runners for speed and glue for structural joins.
Fabric, thread, and soft-furnishing supplies Sewing is one of the most satisfying ways to make useful objects, and you don’t need a lot of space.
- Cotton quilting-weight fabric: stable, affordable, and easy to handle by hand or machine.
- Linen or cotton-linen blends: great for tote bags and simple cushions if you prefer a textured look.
- Basic sewing thread (polyester or cotton-wrapped polyester) and a universal needle set.
- Hand-sewing needles, pins that won’t bend, and a small pair of sharp fabric scissors.
Decision rules:
- Start with woven cotton rather than slippery synthetics.
- Use pre-cut fabric panels or fat quarters to keep choices simple.
- Practice two or three basic stitches (running, backstitch, whipstitch) before attempting hems or zippers.
Yarn and simple knitting/crochet Yarn crafts are portable and forgiving; you can frog mistakes easily.
- Choose worsted weight (medium) yarn in acrylic or cotton blends for easy handling.
- Use a pair of straight needles or a crochet hook in the size recommended on the yarn label.
- Keep stitch markers, a blunt tapestry needle, and a small pair of scissors handy.
Decision rules:
- For a first scarf or cozy accessory, worsted weight plus size 8–10 US needles lets you see progress quickly.
- Avoid novelty yarns (eyelash, bouclé) for your first stitches — they hide mistakes and are harder to remove.
Wood and small carpentry You can work with wood without a full workshop if you choose forgiving materials and simple joinery.
- Softwoods like pine or poplar: lighter, easier to cut and sand.
- Pre-cut plywood panels or shiplap strips from the hardware store: great for floating shelves and small boxes.
- A few hand tools: a hand saw or a jigsaw (if you’re comfortable), sanding block, wood glue, clamps, and a hammer.
- Finishes: water-based stains and a satin polycrylic are beginner-friendly and low-odor.
Decision rules:
- Pick pre-cut or straight-edge boards to reduce measuring and cutting errors.
- Use wood glue + simple brad nails for small boxes instead of complex joinery.
- Sand between coats when finishing to achieve a smooth result without stress.
Paints, finishes, and surface treatments Paints give high impact with limited complexity when you pick the right kind.
- Acrylic craft paints: fast-drying, low-odor, and water-soluble while wet.
- Chalk paint: popular for quick furniture updates because it adheres well and often needs little prep.
- Acrylic craft brushes (synthetic), foam brushes, and a small roll for larger flats.
- Finishing: water-based clear coat for protection if the piece will be handled.
Decision rules:
- For furniture, a good primer or a chalk paint base reduces sanding and prep time.
- For decorative items, use acrylics for color work and a matte or satin varnish to protect.
Recycled and mixed media Working with recycled materials helps you save money and reduce waste — and it’s often highly forgiving.
- Clean glass jars, cardboard, scrap fabric, old sweaters, or magazines.
- Adhesives suited to the mix: hot glue for quick bonds, PVA for paper and fabric, epoxy or specialty glues for permanent fixes.
- Fasteners like brass brads, split rings, and binder clips to hold things while you work.
Decision rules:
- Embrace the quirks of recycled items; plan around imperfections.
- When joining dissimilar materials, test the glue on an inconspicuous spot first.
Basic tools and storage that matter You don’t need a whole toolbox to start. Focus on a compact set that supports many projects.
- Cutting: a good sharp pair of scissors for fabric and a craft knife with extra blades for paper.
- Measuring: a clear ruler (metal for cutting), a small tape measure.
- Fastening: small clamps or binder clips, a hot glue gun with low-temp sticks, an adhesive runner.
- Finishing and cleanup: sanding block, soft cloths, and a small plastic tray or mat to protect your surface.
- Storage: a shallow bin or an accordion folder to keep project parts organized and visible.
Decision rules:
- Prioritize tool quality over quantity: one sharp pair of scissors is more useful than many dull ones.
- Keep tools in a kit that you can tuck away to suit small-space living.
Starter material table
| Project type | Essential beginner-friendly materials | Minimal tools | Why these materials? |
|---|---|---|---|
| Greeting cards & small paper gifts | Cardstock (80–110 lb), mixed-media paper, adhesive tape runner, glue stick, small watercolor set | Scissors, craft knife, ruler, bone folder (optional) | Low cost, fast results, stores flat |
| Simple sewn items (pillow, tote) | Quilting cotton or linen blend, polyester thread, basic interfacing | Sewing machine or hand needles, fabric scissors, pins | Stable fabric, forgiving seams, few fitting issues |
| Knitted or crocheted accessories | Worsted-weight yarn, matching needles/hooks | Pair of needles or crochet hook, tapestry needle, stitch markers | Quick progress, portable, easy to frog |
| Small wood projects (shelf, box) | Pine boards, pre-cut plywood, wood glue, basic nails or brads | Hand saw/jigsaw, clamps, sanding block | Easy to manipulate, low-cost, simple joinery |
| Painted decor or furniture refresh | Acrylics or chalk paint, foam brushes, water-based varnish | Brushes, sanding block, drop cloth | High visual impact with minimal prep |
| Recycled creations | Clean jars, cardboard, fabric scraps, strong adhesives | Hot glue gun, scissors, craft knife | Low cost, creative, environmentally friendly |
This table helps you pick a focused shopping list so you’re not buying entire aisles of supplies you won’t use.
Sizing, scale, and how much to buy Beginners often buy too much “in case” material. Instead, estimate by project:
- Paper projects: buy a small pack of cardstock and a few sheets of specialty paper. Many stores sell single sheets.
- Fabric: buy a fat quarter (18″ x 22″) or half-meter to practice. You can cut patterns to fit.
- Yarn: one or two skeins are often enough for small accessories.
- Paint: small 2–4 oz bottles or testers are enough to experiment.
Decision rules:
- Buy less when you aren’t sure of the color or texture. Use small amounts to test.
- Keep a little sample stash: a folded swatch, a paint chip, and a short yarn tail taped to a scrap — these help you remember what worked.
Sustainability and budget considerations Being beginner-friendly also means being kind to your budget and the planet. Look for:
- Recyclable packaging and refillable paints.
- Scrap or end-of-roll fabric bins at local shops.
- Secondhand tools — a well-maintained secondhand seam ripper, rotary cutter, or set of needles can be a great bargain.
Decision rules:
- If a brand-name tool is out of your budget, shop around for a well-reviewed budget alternative rather than the most expensive version.
- Repurpose what you have — cardboard and jars go a long way in prototype stages.
Common mistakes and fixes
When you’re learning, mistakes are normal. What matters is fixing them in a way that preserves momentum and confidence. Here are common pitfalls and how to address them without shame.
Mistake 1 — Buying high-end tools before learning the basics Why it happens: You think a better tool will make you instantly better. Fix: Start with mid-range, well-reviewed tools. A decent craft knife and a good pair of scissors are enough to begin most projects. Once you’ve made a few projects and know where you’ll invest time, upgrade the specific tool that helps your favorite technique. This way you avoid clutter and wasted money.
Mistake 2 — Choosing materials that demand precise technique Why it happens: Shiny finishes or fragile textiles look attractive and professional. Fix: Favor forgiving materials at first — cotton fabric, medium-weight yarn, softwood boards, and acrylic paint. These materials tolerate mistakes and let you practice finishing and technique before you commit to fragile or high-cost supplies.
Mistake 3 — Skipping test pieces and prototypes Why it happens: You want to get to the finished product quickly. Fix: Make a single prototype or test patch first. This solves fit, color, and bonding questions early. If you’re making a sewn pillow, sew a tiny sample block to test seam allowance and fabric behavior. If gluing mixed materials, test the glue in a corner.
Mistake 4 — Using the wrong adhesive or too much glue Why it happens: Glue seems like a simple fix for everything. Fix: Match your glue to the materials. Use PVA for paper and fabric, hot glue for quick temporary bonds and heavy embellishments if the materials are heat-tolerant, and specialty epoxies for a permanent bond on metal or glass. Apply glue sparingly and clamp or weigh pieces while drying to prevent warping or visible squeeze-out.
Mistake 5 — Poor measurement habits Why it happens: Estimating looks faster when you’re excited to start. Fix: Measure twice, cut once. Use a clear metal ruler for straight cuts and mark lightly with a pencil. For sewing, make a small muslin or practice seam to calibrate your seam allowance. A little time spent measuring will prevent wasted materials and frustration.
Mistake 6 — Overcomplicating the first project Why it happens: You want a polished result and add features like zippers, lining, or hidden stitching too soon. Fix: Simplify. Choose patterns and designs with minimal steps. For a sewn bag, make an unlined tote before attempting pockets or closures. Build skills incrementally so each new feature becomes a small, accomplished step rather than a stumbling block.
Mistake 7 — Ignoring tool maintenance Why it happens: Tools seem ready to use out of the box. Fix: Keep blades sharp, clean brushes thoroughly, and oil moving parts on small hand tools. A sharp blade and clean brush make your results neater and reduce fatigue. This small habit pays off quickly.
Mistake 8 — Not planning for storage or workflow Why it happens: Materials pile up and create decision friction. Fix: Create a small kit for your current project — a shallow box with exactly what you need. Label it or use a clear container so you see progress. When everything has a place, you’ll spend less time searching and more time making.
Mistake 9 — Comparing early work to polished tutorials Why it happens: Social feeds show the end result without the missteps. Fix: Track your process with photos and notes. Celebrate practice pieces and view them as part of learning. You’ll notice real improvement over weeks and months, which is more motivating than instantaneous perfection.
Mistake 10 — Skipping finishes that affect durability Why it happens: Finishes feel like an optional step. Fix: For functional pieces, finish appropriately — seal paints, top-stitch durable seams, and reinforce stress points. A small amount of finishing work adds longevity and makes the piece feel intentional.
How to apply fixes without getting stuck
- Prioritize one fix at a time. If your biggest issue is measurement, focus on tools and templates.
- Keep a short list of lessons learned after each project — a single line noting what went wrong and how you fixed it improves your next project.
- Ask a friend or a local maker for one small piece of feedback rather than hunting for perfection online.
Next steps
Now that you understand how to choose materials, what should you make next and how should you grow your skills? Aim for projects that reward repetition and build one complementary skill at a time.
Try one of these focused, beginner-friendly next steps:
- Recreate the weekend greeting cards you prototyped. Make three variations using one new technique (stamping, watercolor wash, or embossed accents). This builds confidence in a small, contained way.
- Sew a simple zip pouch or a cushion cover with pre-cut fabric. This teaches seam allowance, pressing, and finishing.
- Knit or crochet a simple scarf or tea cozy in worsted yarn to master tension and basic stitches.
- Upcycle a small wooden crate or a thrift-store shelf with chalk paint and a simple wax or poly finish for a useful home object.
- Assemble a tiny mixed-media collage using recycled paper and fabrics to practice adhesives and composition.
What to build on next
- Color and finish: Practice mixing paint colors and testing varnish finishes on scrap wood or cardboard.
- Tool upgrades: Buy one higher-quality tool when you’ve outgrown the starter version — a rotary cutter, a reliable pair of shears, or a small rotary tool for finishing.
- Pattern reading and templates: Learn to read a simple sewing or woodworking pattern and create your own templates for repeat projects.
- Slow creative habits: Set a small weekly time slot for making; even 30–60 minutes builds momentum.
Keeping it calm and useful You don’t have to make every project a masterpiece. Focus on process: choose materials that help you feel steady and capable, not overwhelmed. Keep a simple toolkit and a tiny stash, test early, and let each project teach one thing that you can reuse. Over time, your decisions about materials will become intuitive, and you’ll find projects that fit your life, space, and time naturally.
If you want a concrete starting list for your next shopping trip, pull together:
- One small pack of cardstock (two colors), a tape runner, and a 6-color watercolor half-pan set.
- One fat quarter of cotton fabric, basic polyester thread, and a hand needle or a simple sewing kit.
- One skein of worsted yarn and a US 8 needle or a 5 mm crochet hook.
- One small bottle of chalk or acrylic paint and a foam brush.
Keep your first purchases focused and useful so you get making quickly. As you finish small projects, add one new tool or material to your kit based on what you enjoyed and what you want to learn next. The right materials shouldn’t impress anyone — they should make things easier for you.